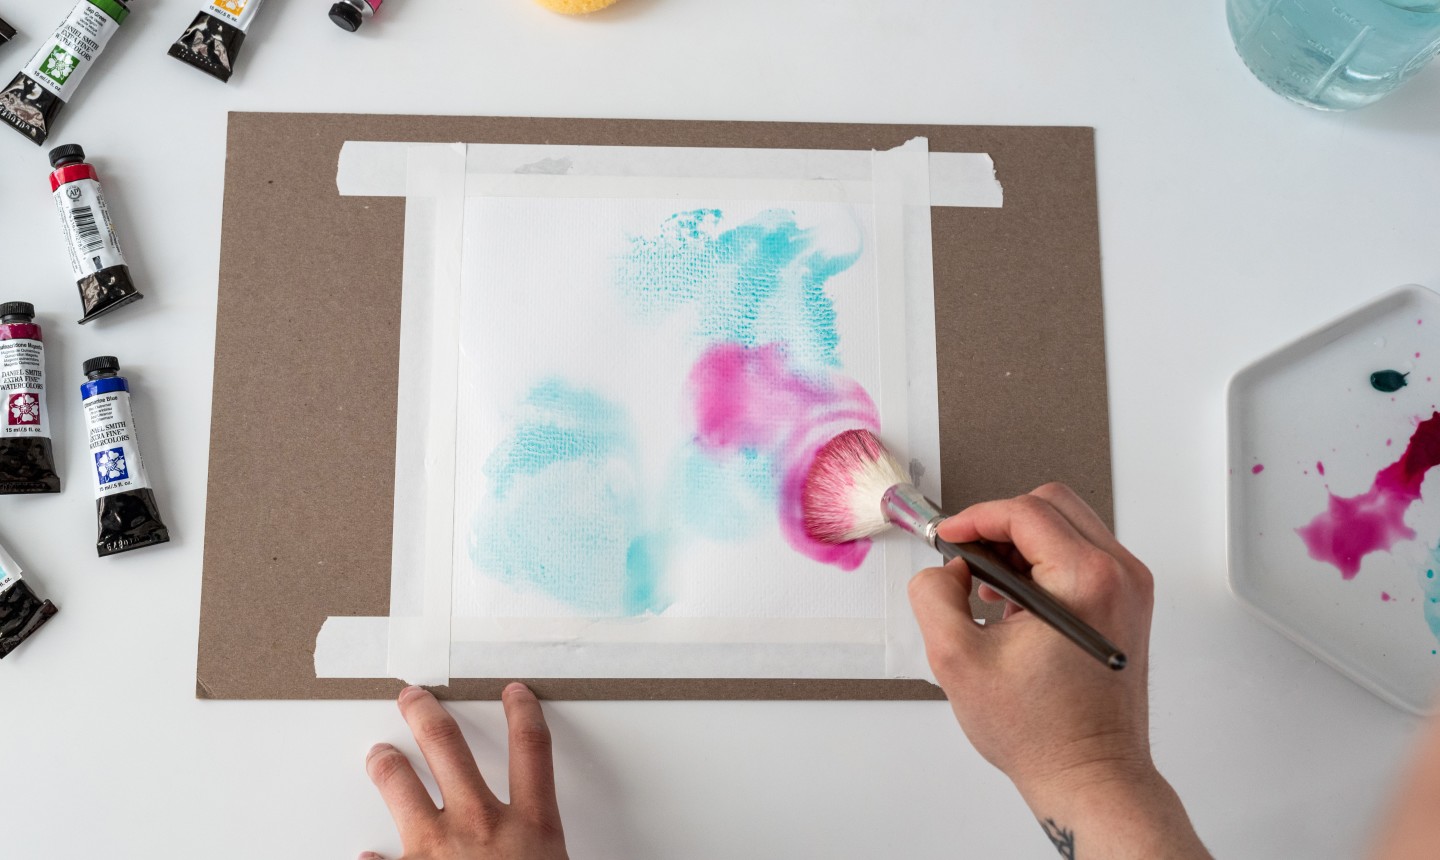
You Tube or Tutorial Watercolor Technique Loosing an Edge and Finding It Again
Hold information technology right at that place: Before you start adding fancy details and textures to your work, you need to know a few of the most basic watercolor painting techniques to try. Use these to get started, then build on them notwithstanding you like.
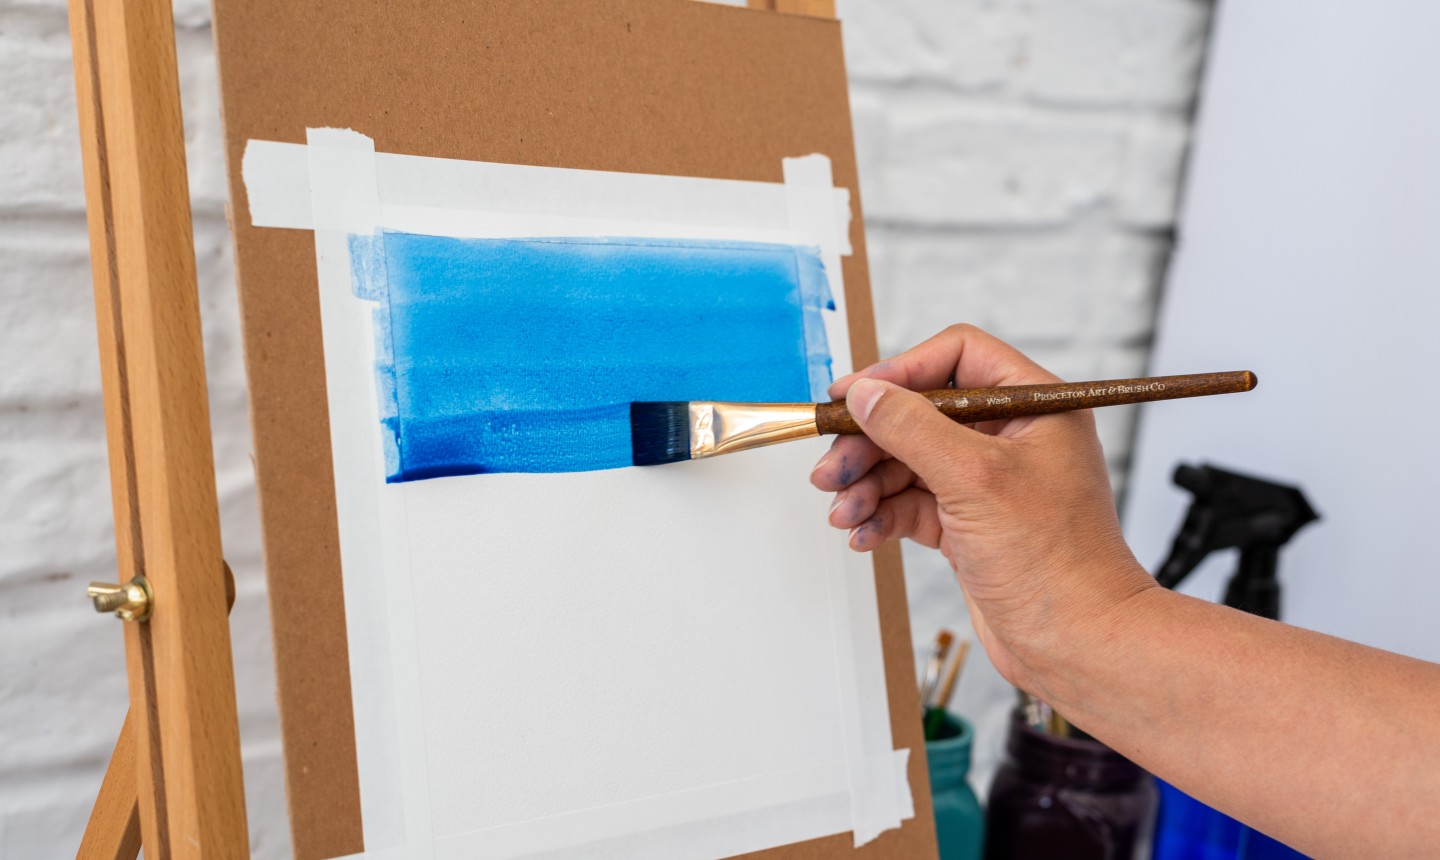
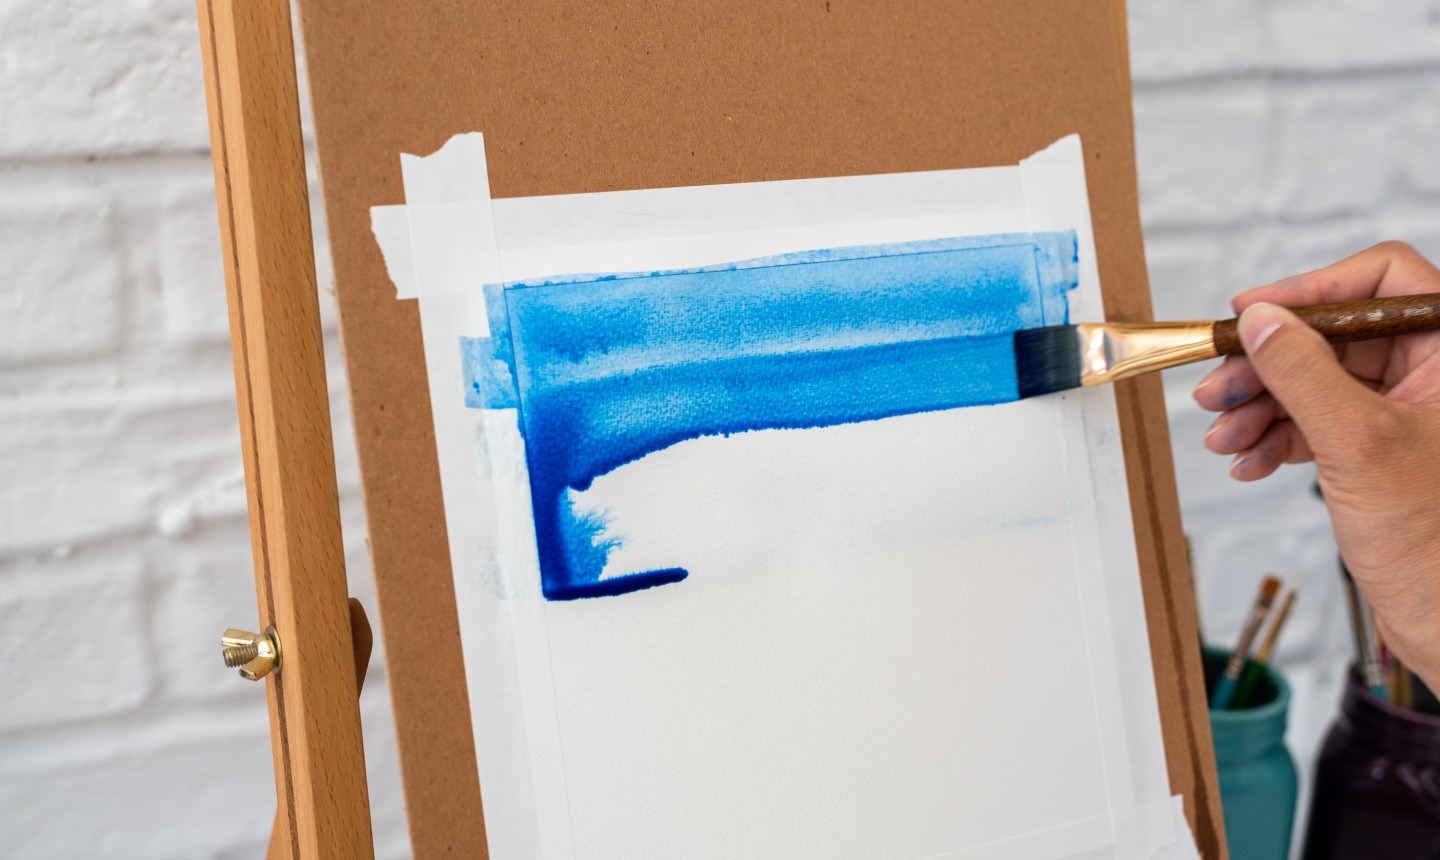
1. Watercolor Washes
There's more than than one mode to arroyo laying a watercolor launder — you tin either do information technology on a wet surface or a dry i.
1 tip for whatsoever watercolor wash: If you notice a mistake in a previous stroke, don't try to fix information technology. Once the wash has started to dry, a new stroke will almost definitely be more noticeable than any small mistake. It'southward best to get out these happy niggling accidents equally they are.
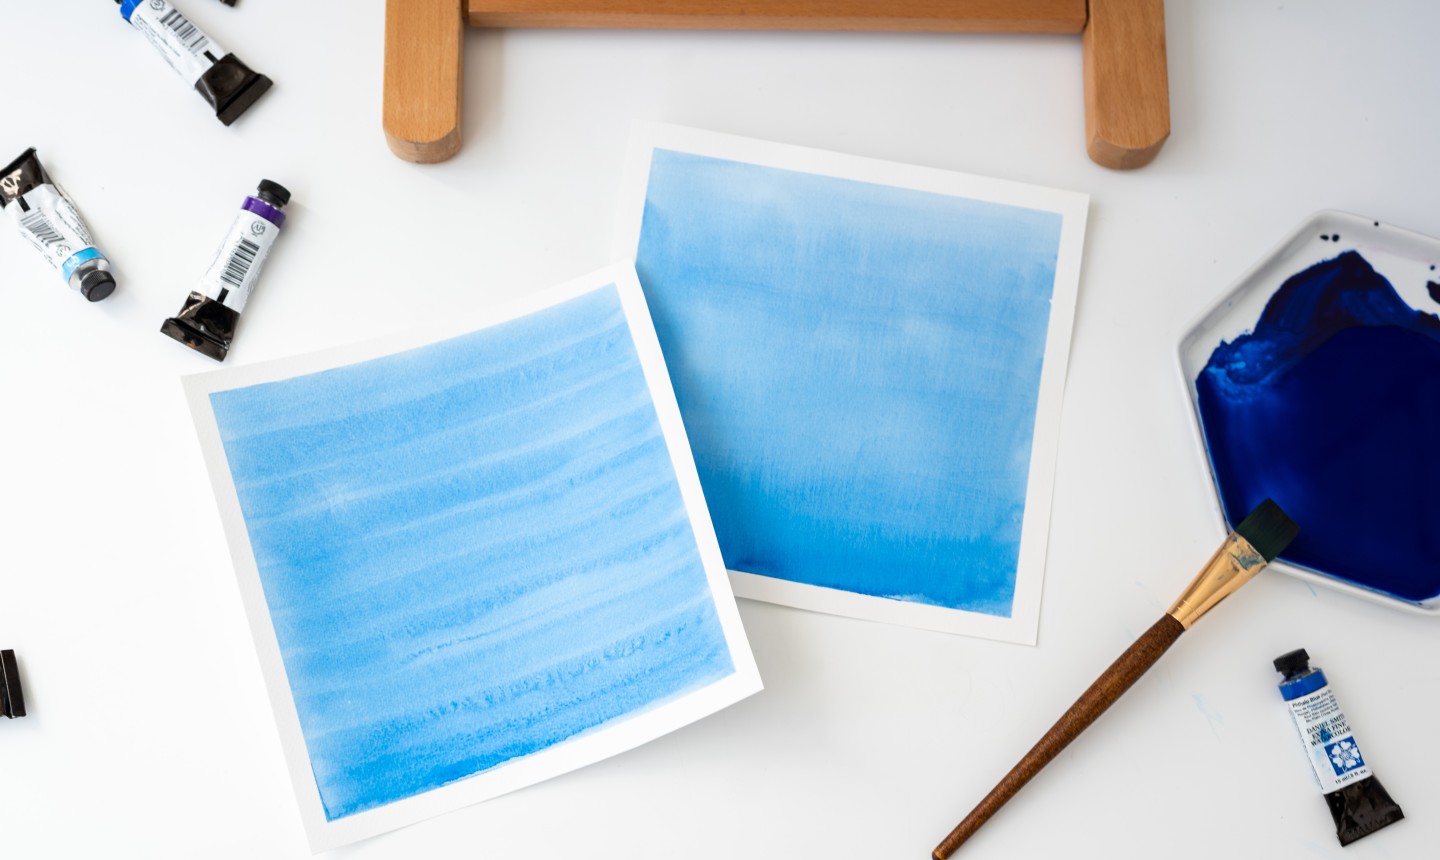
Dry Wash
Use a large flat or round castor and an angled surface similar a drafting table or easel (this way gravity does some work for you.) On your palette, mix a generous amount of water with your chosen pigment. Retrieve that watercolors dry lighter than they look when they're moisture. You might desire to practice on a scrap of watercolor paper first.
Load your castor with equally much pigment equally information technology'll hold. And then, working chop-chop, make a steady, controlled horizontal stroke along the top of the paper. You'll notice the h2o in the first stroke starts to pool along the lesser border — don't let this dry out! Reload your brush with paint and paint another stroke just below the outset one, overlapping with the lesser border.
When you achieve the bottom, blot your brush on a newspaper towel, then apply the dry tip to carefully pull upward the backlog paint along the bottom of the terminal stroke to avoid a darker lesser. Let your paper dry completely at an angle before setting it down apartment once more.
Wet Wash
A wet surface watercolor wash is nearly the same every bit a dry wash, with one main deviation: First yous'll dip your castor in water and castor it over the whole surface. Be generous with the water hither — you desire the paper glistening with moisture.
One time you've wet the surface area, dip the brush in paint and apply lines of color within the wet area, merely like y'all would with a dry wash. The paint will blend together into ane luminous wash of color.
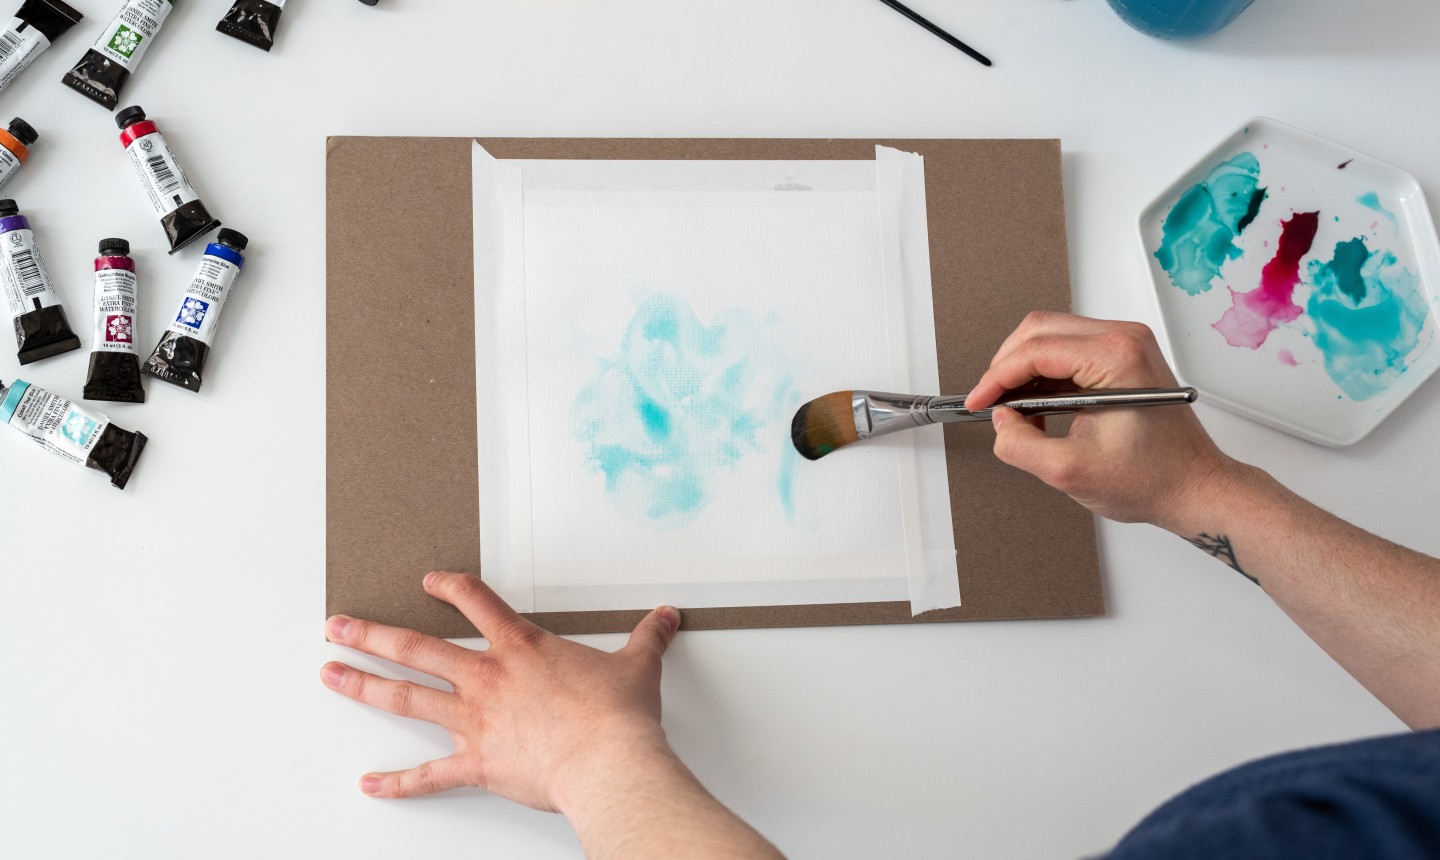
two. Wet-In-Wet Watercolor Painting
Wet-in-moisture painting is i of the about basic techniques — so basic you might have already done information technology earlier without realizing information technology!
Kickoff past brushing water (and only h2o) onto your newspaper. Then dip your castor in paint and spread it over the water wash. The paint will feather and diffuse similar magic.
3. Underpainting
An underpainting is essentially a monochrome wash that's used for the kickoff layer of the painting. You lot'll add together layers of transparent washes over the underpainting, which gives realistic and luminous effects.
Commencement, mix a low-cal imperial shade (a philharmonic of cadmium ruby-red and ultramarine blueish works bully). Neutral shades of bluish or green can also work.
Lightly paint your discipline using the purple, and pay conscientious attention to lite and shade. Since you lot're but working in one color, you can really focus on rendering the shape. Use a soft castor and a light hand to keep the imperial from overpowering the residual of the painting.
Allow the underpainting dry completely before moving on to glazing in color. If it'due south moisture, you might muddied your colors.
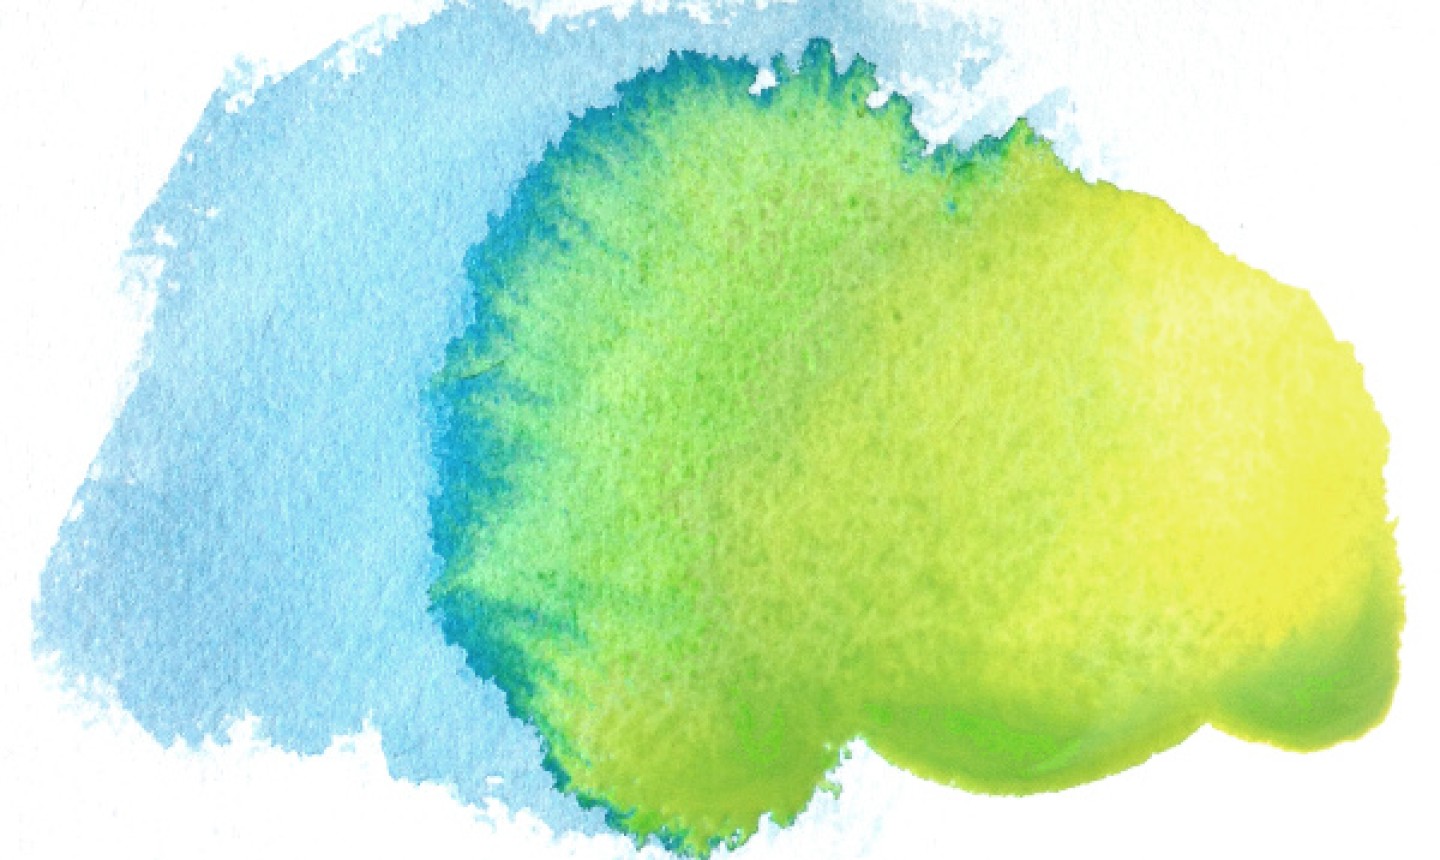
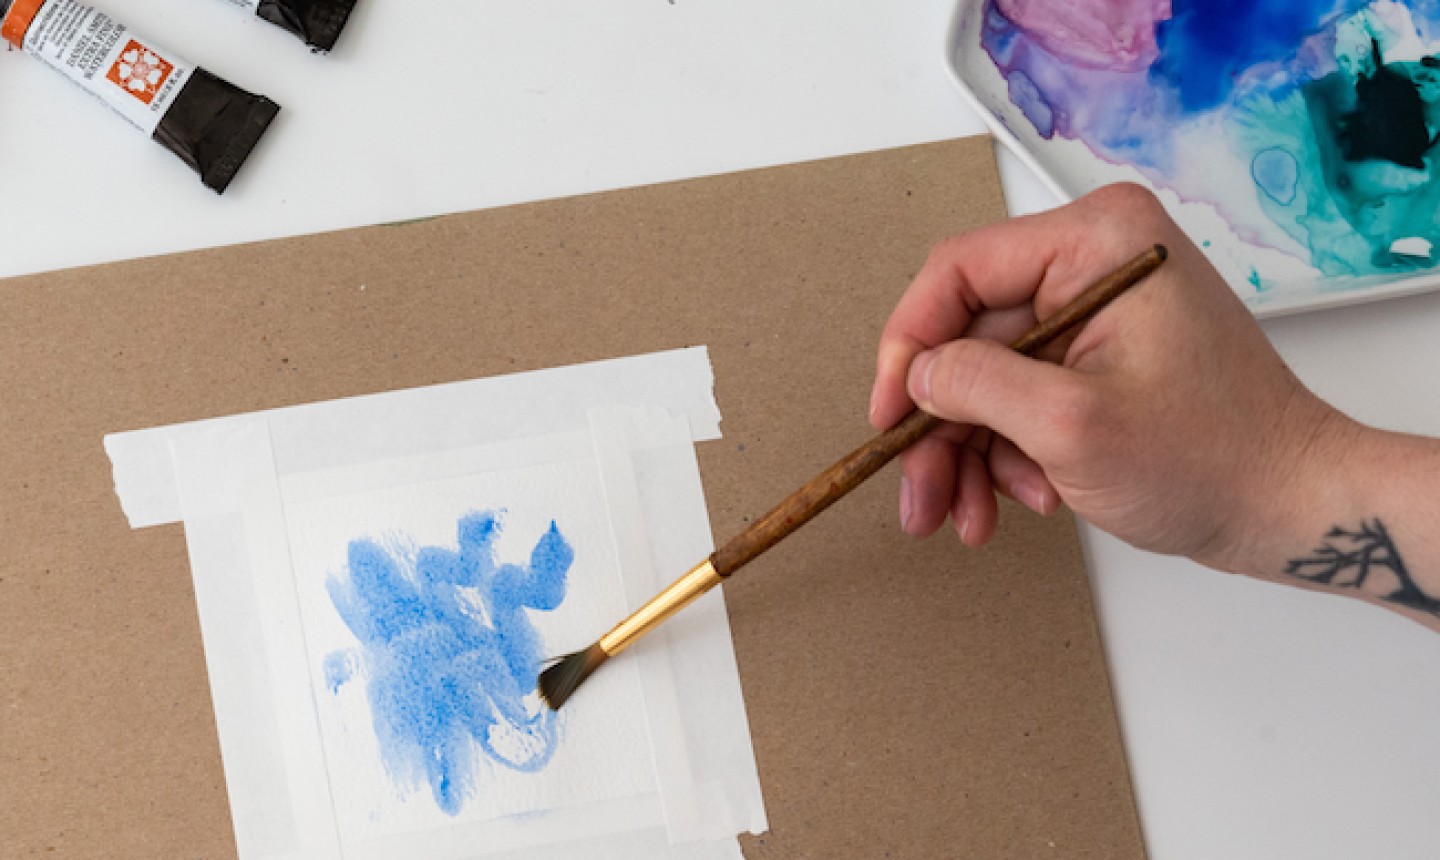
iv. Gradients and Color Blending
A simple watercolor wash uses just one color, but you tin can add depth to your work past using more hues in a gradient. Showtime by adding fresh watercolor to a wet paint surface.
Then identify the second color — either a more than intense version of the same hue or a different hue entirely — right beside the first color.
Because the paints are on a wet surface, they'll alloy slightly and create a natural slope in the tones. Yous tin control how neat or painterly a gradient comes out by the wetness of the pigment.
five. Layering Watercolors
Once a color of paint has dried, you can add layers of watercolor to create dimension, texture and colour variation. Just know that the paper has to be completely dry in between washes and then that the colors don't blend together and go muddy.
Wait until your initial colour has dried completely (not damp — dry!), then pigment the 2nd colour on top. Merely don't add much water to the second color since this can re-wet the initial color and brand the two blend.
To make the lines of your second color less astringent, you lot can wet the brush with water and brush gently to plume the line.
six. Dry Brush
Dry brush painting requires using very little paint and water to create a scratchy, "scraped-across" brushstroke. It tin can exist used for an unabridged painting, only it's besides perfect for creating texture in small-scale areas of a larger painting.
Mix your paint, making sure your paint mixture is non super moisture. Dip your dry brush into the paint, dab it onto a newspaper towel to remove the backlog, and brush lightly across the surface — this method highlights the texture of the newspaper and also doesn't muddy your colors.
vii. Lifting Color
In some cases, you lot'll desire to remove pigment from your painting. This is especially handy when you've made a mistake or when you want to add white space to your work. Using unlike techniques, you lot can lift color from wet or dry out watercolor.
Lifting from Wet Watercolors
If your pigment'southward still wet, information technology'southward like shooting fish in a barrel to remove pigment. Blot your castor thoroughly and touch it to the pigment to lift it back off the paper. The trick here is that the damp-merely-blotted castor absorbs more water than it releases, so it'll rapidly pick the wet colour up from your painting.
Another choice is to apply a paper towel or tissue paper to elevator the paint. These tools can exist the ameliorate selection if you're going for a more abstract, less controlled white space. If you desire more command, use a castor.
Lifting Dry out Watercolor
You lot can also lift paint off the page even if the paint'south dry, though it's a little more hard. Believe information technology or non, this tin can be pretty effectively washed with a simple eraser.
For a little more control, start past wetting the area with water, then utilize a stiff, nearly dry castor or a paper towel to lift the colour.

eight. Watercolor Blooms
Watercolor blooms or blossoms like these happen when very wet paint spreads on a drier (just non completely dry) area of a painting. When yous employ wet paint on a still-clammy wash, the liquid forces the original paint out, and information technology creates these fun, irregularly shaped splotches.
First, lay down a colorful moisture wash and let it dry out a little. And then load your brush with water and bear upon it lightly to the newspaper. The drops of water will create sharply defined blooms. How dry the underlying wash is determines the hardness of edges.
Y'all can besides do the aforementioned thing with ii colors: Apply the kickoff and let it dry a fleck. Then apply a wet wash of a different color correct next to the first 1, and so that they come in contact. The wetter of the ii washes will flow into the other.
nine. Back Washes
This technique is similar to watercolor blooms because it requires a certain level of dryness to get the expect. Utilise a wet launder of color and tilt the surface a lilliputian. The colour should drift to i side of the painting area. Then set the surface down flat. Every bit the water dries, information technology bleeds upward again and creates a back wash.
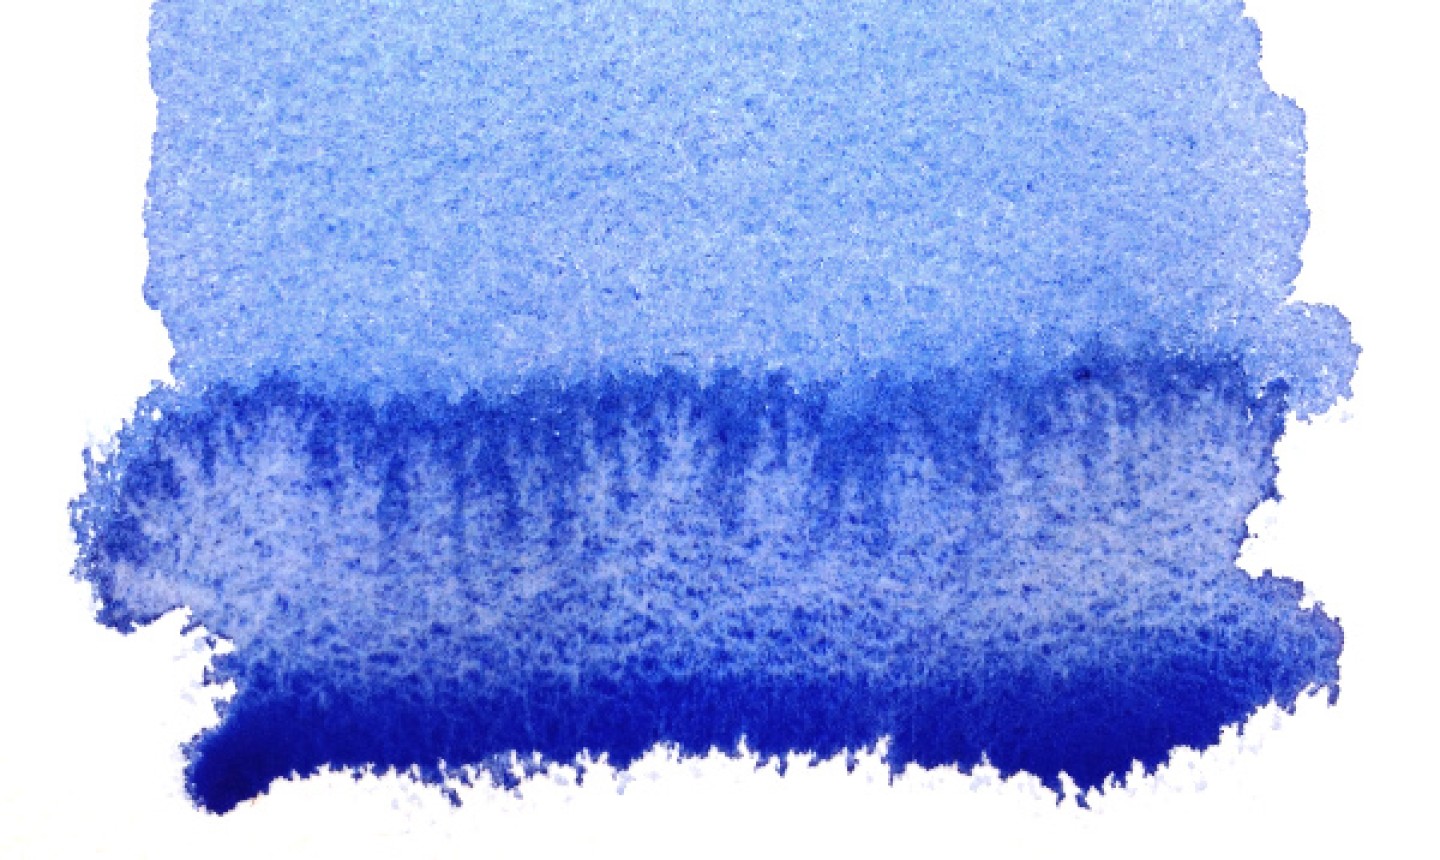
10. Feathering
If you're going for a gradient that goes from a saturated colour to a more transparent hue, adding more paint won't do the trick. What you need is water. Outset with a strong area of color and then use a make clean, wet brush to "lengthened" the color, making a gentle slope or "feathering" event.
11. Lines, Hatching and Crosshatching
Watercolor can be used to paint lines of whatever size, shape and thickness. Just like with pen and ink drawings, you tin can place lines beside each other or layer them perpendicular to each other for a hatching or cross-hatching effect.
For clean lines, employ a small, pointed brush and load it with pigment, using only a dash of h2o. Then, paint a line on your paper. Depending on how much water you lot add to the brush, you can get night, crisp lines or flowy, freeform lines.
12. Scumbling
Scumbling is a technique where irregular motions are used to make either a line or layer on paint. It's basically like scribbling with your brush. Don't think likewise hard about it: just paint irregularly in an area. To actually meet the texture, use a relatively dry brush.
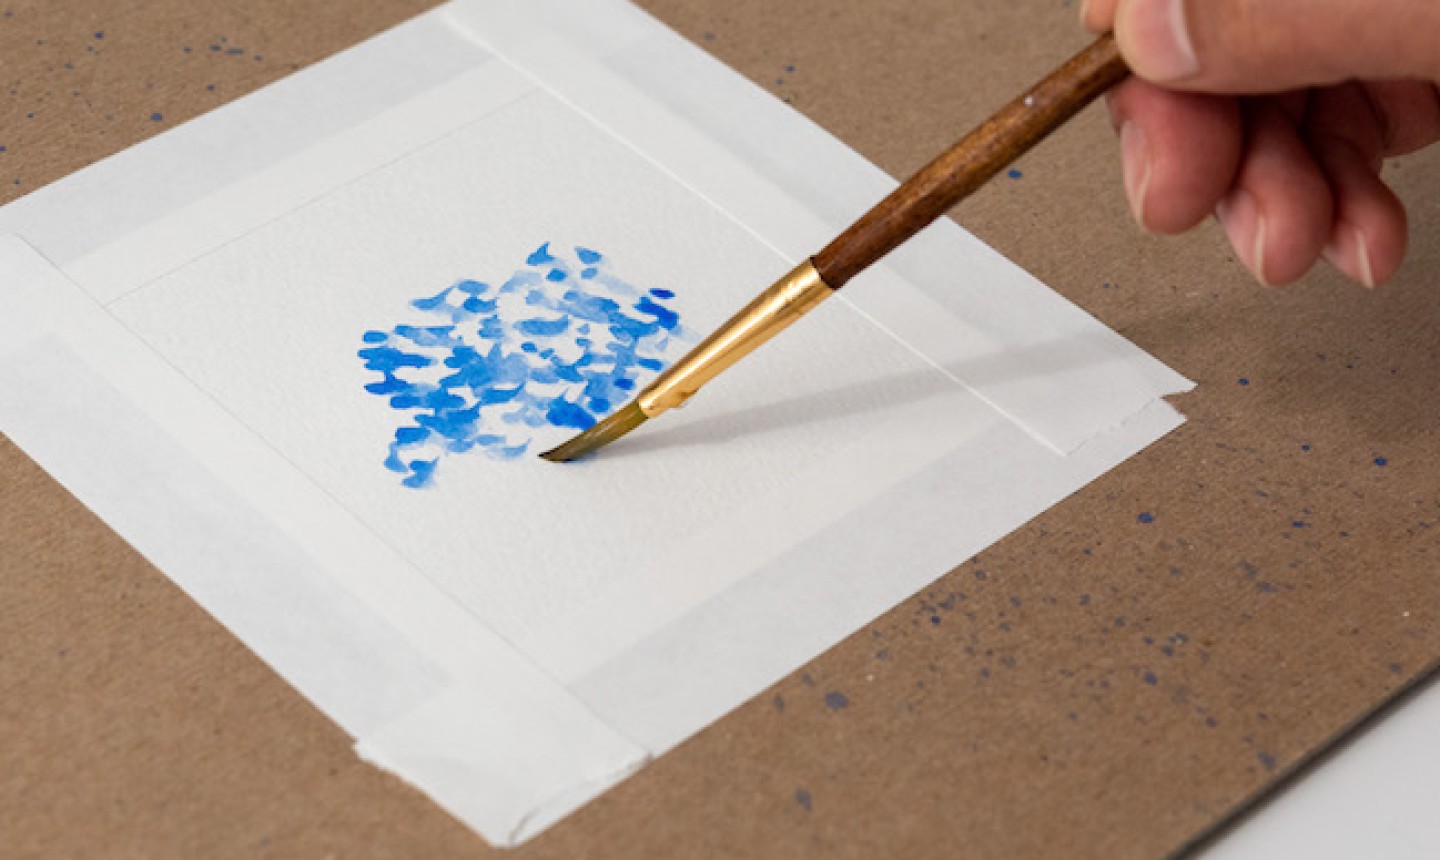
13. Stippling
Instead of applying lines or areas of paint, stippling is painting tiny dots in a full-bodied area. Once you've painted many dots, you'll have a saturated colour and fascinating texture.
Stippling can be neat and tidy, or the marks can overlap in a more than freeform style. You lot tin utilize a fairly dry out brush for more defined dots or a wet brush for a looser look. And of course, the size of the brush you cull will determine the size of your dots, so cull carefully.
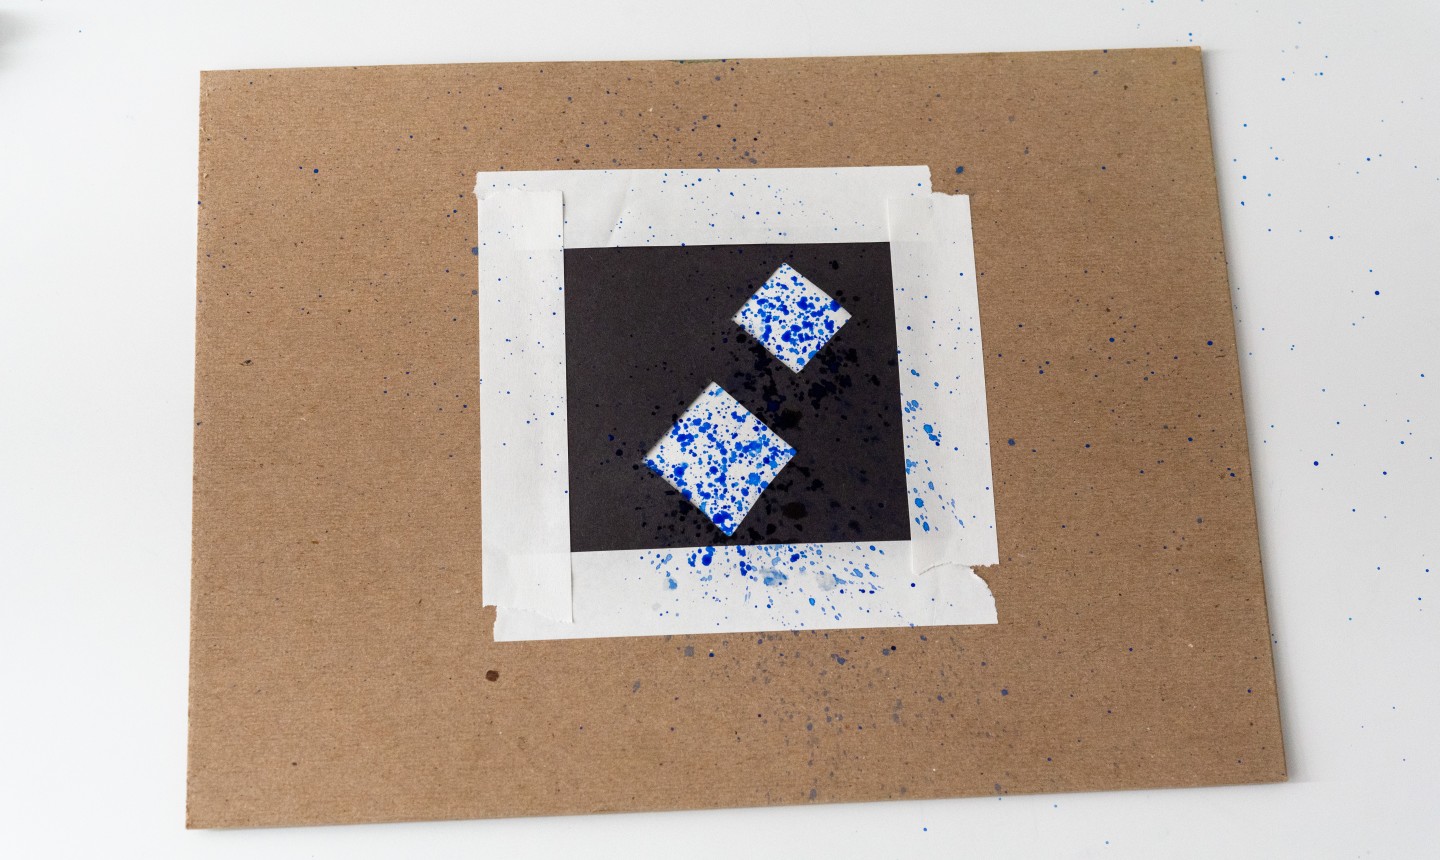
xiv. Splattering
Hello, Jackson Pollock. Splattering gives your painting an energetic vibe, merely it's easier said than done — this technique can easily get messy and uncontrollable. But there are three approaches to making splattering more than outgoing.
The Tapping Method
Fill the bristles of your paintbrush with paint. So, either with your fingers or a second brush, gently tap the pigment-filled paintbrush over your paper. That will give the paint plenty forcefulness travel across your sail and cover a lot of ground. But go on in mind that this method makes the pigment more than difficult to control.
The Flicking Method
For more command over your splatter, you've gotta get your hands dirty. Load a strong-bristled brush (or a spare toothbrush, if you have one) with pigment and hold it in ane mitt at a downward angle, and so the bristles are pointed toward the ground. Then, with your opposite paw, slowly run your fingers along the edge of the brush, pulling the beard back so that they launch pigment onto the canvas.
Make a Stencil
For ultimate control over your splatter paint, make a stencil. It'south uncomplicated — just cut a shape from a large canvass of paper and identify it over your canvas before splattering pigment.
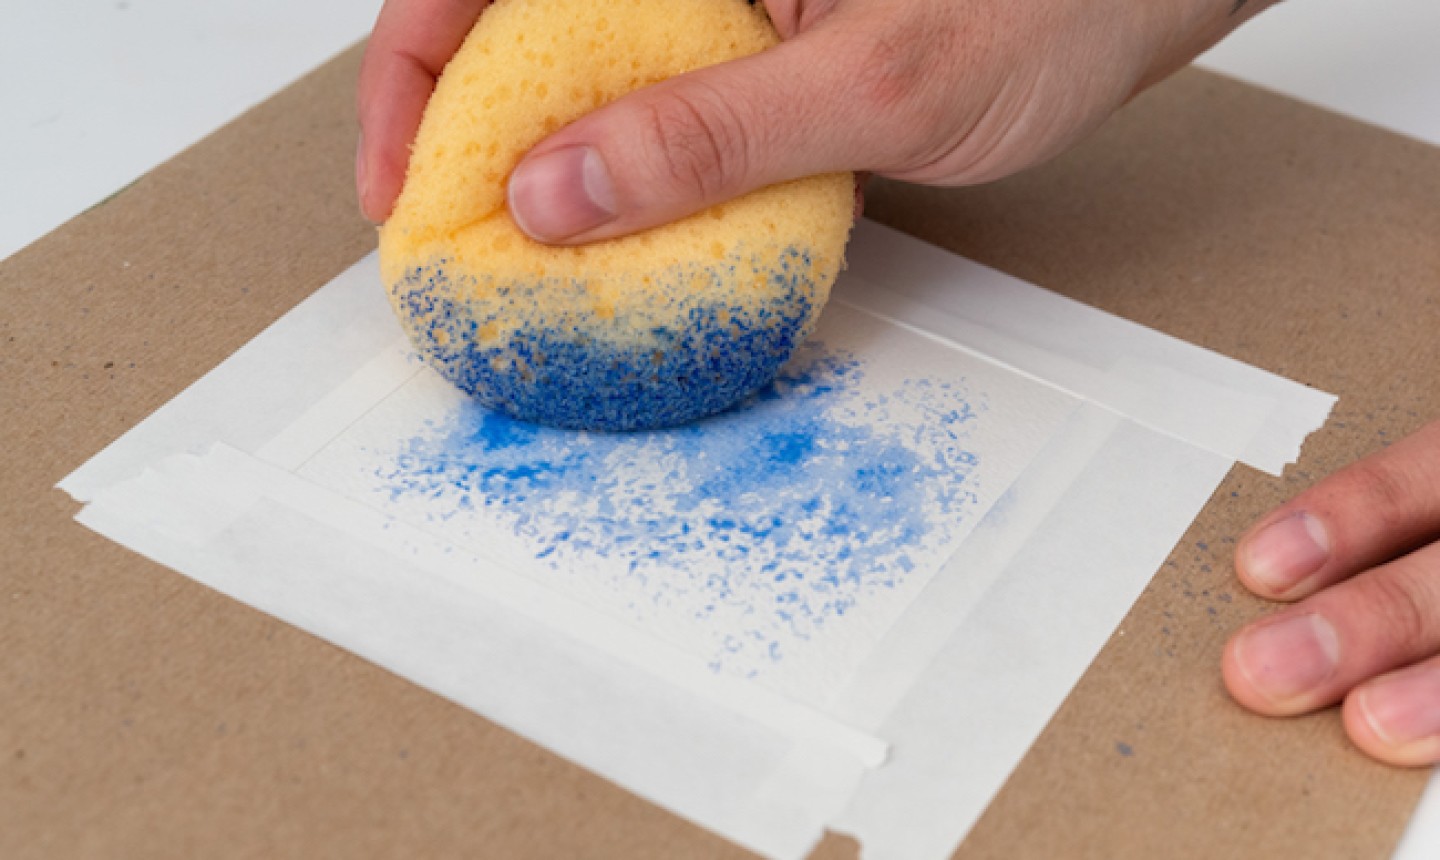
15. Sponge Painting
A textured sponge tin can be a very handy tool to paint everything from foliage in trees to sand on a beach. You can apply a body of water sponge or a regular new household sponge; just dip it into your pigment and press it to your paper.
16. Adding Texture with Table salt
When table salt is sprinkled on a wet wash, it starts to gather the watercolor pigments and makes the coolest texture. The event will vary depending on the size of the grains of salt and the wetness of the paper, and so experiment on scraps of watercolor paper before you commit on your concluding painting. One time the paint is dry, simply castor off the excess table salt.
Source: https://www.craftsy.com/post/watercolor-techniques-you-have-to-try/
0 Response to "You Tube or Tutorial Watercolor Technique Loosing an Edge and Finding It Again"
Enregistrer un commentaire